My inky travels along life's rocky road

Wednesday, 28 April 2021

Monthly Challenge - April


 For the penultimate month of the monthly challenge the theme is:

                                                         Y for Yesterday

The colour option is yellow.

I struggled with this one and I'm not sure I hit the brief but I was going for a vintage/ancestors vibe. I started off with a piece of card sprayed with Glimmer Mist in peach. I don't know if anyone remembers but Glimmer Mists were one of the early shimmer sprays on the market. They were notorious for clogging nozzles and I have 3 or 4 of these sprays (I think I won them in a competition) which have barely been used despite repeated efforts to clear the nozzles. I was about to recycle an empty bottle of blow-dry spray when I thought I would see if the Glimmer Mist would work in it. It worked so now you will find peach Glimmer Mist on many projects and I am waiting to decant another colour in another empty spray bottle.

Anyway back to the above project on which I then used a TH clocks stencil with mustard seed DI. I edged the top and bottom with brushed corduroy DI and stamped the text from Paper Artsy Ancestors plate 3. The 2 images are from the same set and I used a new rectangle die set to cut them out. The male image didn't have a defined frame so I cut a rectangular frame and coloured it in black. The shield which is raised on foam tape is the waste from the stamped images and the mopping up of excess brushed corduroy DI on my craft sheet which I used to watercolour the image backgrounds. The die is from a Sizzix set and I added some mustard seed DI and edged it in black.

The flower spray is a die cut I had on my desk (I think it's one of the TH wildflowers). I coloured it with alcohol markers and added glossy accents to the flowers.

Next month is the last letter in our challenge!


Friday, 16 April 2021

Unrivalled Passion Pocket Cards


 Whilst making the background in my previous post I made another background using the same colours and stencil but a different stamp. This piece was sitting on my desk and I thought it would make a good pocket card for my mini album of random things. I managed to squeeze 2 pocket cards out of the piece by matting one onto a postage stamp edged pocket card. These will sit facing each other on a double page.

I bought the text stamp (Dream Big by Visible Image) a week or so ago and wanted to try it out and this beautiful image by Innovative Stamp Creations seemed perfect to go with it. Both text and image were stamped with Versafine onyx black. I added a Crafty Individuals text stamp to the background in Stazon koala grey.

I am enjoying making these pocket cards with desk scraps and the album is filling up nicely.

Saturday, 10 April 2021

New Technique


 I recently bought a white pigment ink pad (Stazon pigment in snowflake) and wanted to try out a technique I had seen on Jennifer McGuire's channel here . I used a spotty background stamp with the white ink and when it was completely dry I stencilled over it with peacock feathers and mowed lawn DIs. The ink acts a bit like a resist and appears once the die ink is applied over it. I made the background into a quick card with a frame that was sitting on my desk, my old favourite Memory Box poppy die and a Marianne Designs swirl die cut from dark green card.  

Thursday, 1 April 2021

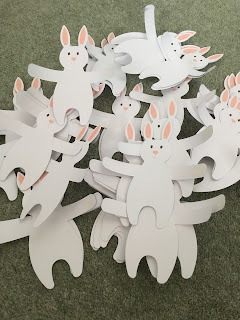
White Rabbits!


Sometimes things are just meant to be. I bought a few dies and embossing folders in the big Sizzix sale at the start of the year but their website was playing up, doubling up on my items and generally being difficult. I had to keep deleting items and adding them in again and during all this I managed to miss one of the dies I wanted which I discovered after I had checked out. I phoned Customer Service to ask if they could add it on but apparently it wasn't Company policy. I thought I would place another order for just that die which was very good value but when I went to do that I noticed the price had gone up to £10 which was more than double the sale price.

I've been regretting missing out ever since until a week or so ago Sizzix had a 'Best Performing Products Sale' and my die - Bunny & Bear Hugs #663452 was there for £3.40. Naturally a couple of other things went into the basket as well!

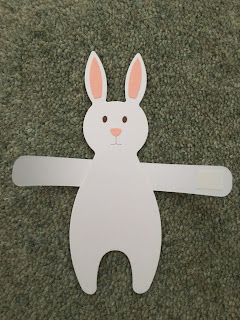
The order arrived last week and I was able to cut several of these bunnies for some very deserving children. The images are self-explanatory and I cut them with white card in case any of the recipients wanted to customise them. There's a tiny bit of DST on one arm/paw which can be used to attach both arms together for a bunny hug or even to hold a mini chocolate egg.


A bit of a rushed job but the bunnies should be with everyone in time for Easter.


Wednesday, 31 March 2021

I've Been Busy


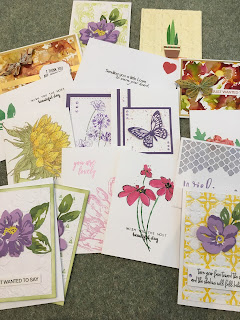
This past month has been quiet on my blog but that's not because I haven't done any crafting. I made a batch of appreciation cards for some people who have been working under extreme pressure for the past year. Mostly they are cards I've blogged before or variations of them but I hope they brought joy to the people receiving them.

Thursday, 25 March 2021

Monthly Challenge - March


 This month's letter is:

                             P for Patchwork

The colour options are Pink, Purple and Platinum.

Last year on my way home from a trip to London I bought a set of dies from a charity shop. They were Crafter's Companion patchwork dies and at £1 each for a set of 2 dies I thought they would be useful for my papercrafting so I bought all 4 sets. At the time I had no idea that we would go into lockdown shortly after and that would be my last trip to London for a long time.

I remembered these dies when the theme for this month's challenge came up and decided to use the clam shell die. I collected 5 different patterned paper scraps in pinks and purples and used the die to cut multiple shapes of each one. The purple ones were run through a lace embossing folder, one of the pink papers was stamped with a Crafty Individuals text stamp in Brilliance platinum planet and a small flower was stamped in Versamark onto the lilac shapes and perfect pearls brushed on top.

I worked out how to arrange them and then stuck them down onto a piece of card. Not  having thought further than that I looked at the card and couldn't think what to add to it for the focal point. Finally I had an idea - an old Tim Holtz stamp and die set called framed silhouettes. I cut the frame from some card on which I had added some silver sticky back foil. I didn't want to use the stamp that goes with it but wanted to add some texture to the frame which I did with a 3D embossing folder called floral mandala. I added another plain frame at the back for some more dimension. I stamped the portrait in Versafine onyx black and die cut it (I should have just cut it out from black card). Finally I added a die cut word from Tim Holtz script friendship words.

Tuesday, 16 March 2021

It's a Puzzle!

 Oh dear we're already halfway through the month and I haven't posted anything in March! That's not to say I haven't been crafting  - I'm trying to make progress on a cross stitch scene I started a couple of years ago and I've told myself I need to get it finished before I can start anything else.

I did put my needle down in order to make this 'card' for my great nephew. I've noticed a trend for jigsaw related cards recently and it reminded me that I have a Sizzix Bigz die called Puzzle Maker #2.

I had some snakes and ladders patterned paper from which I die cut 'Happy Birthday', making sure to keep all the small pieces. I stuck this onto a piece of mount board. I used the same die again with some blue card and inlaid the letters. When the glue had dried I used the puzzle Bigz die to cut the pieces.The outer waste made a nice frame which I mounted onto some white card. Our message will be written onto this and it makes a handy tray to fit the pieces into. It came together very easily and was fun to make. The Bigz die cut through the mount board easily and has made me want to look through my Bigz dies to see what else I can use my mount board offcuts with. 

I shall send the frame with the pieces removed so that the recipient can put it together for himself.

Related Posts Plugin for WordPress, Blogger...